

DIY Decorations and Decor
Tuesday, April 10, 2012
Wednesday, March 28, 2012
Child's Rocking Chair with Chalk Paint

 |
| Jordyn likes the yellow ABC rocker. The unfinished rocking chair, purchased for 5 dollars at Good Will is now a cheery, vintage yellow....I used yellow latex paint and added plaster of Paris to make my own chalk paint. It looks wonderful, but I wouldn't use a shiney top coat again. I didn't mean to buy glossy ....oops. Now the vintage chalk paint is modern and slick...not my usual style. But, as I said, Jordyn likes it just find. |

Thursday, December 8, 2011
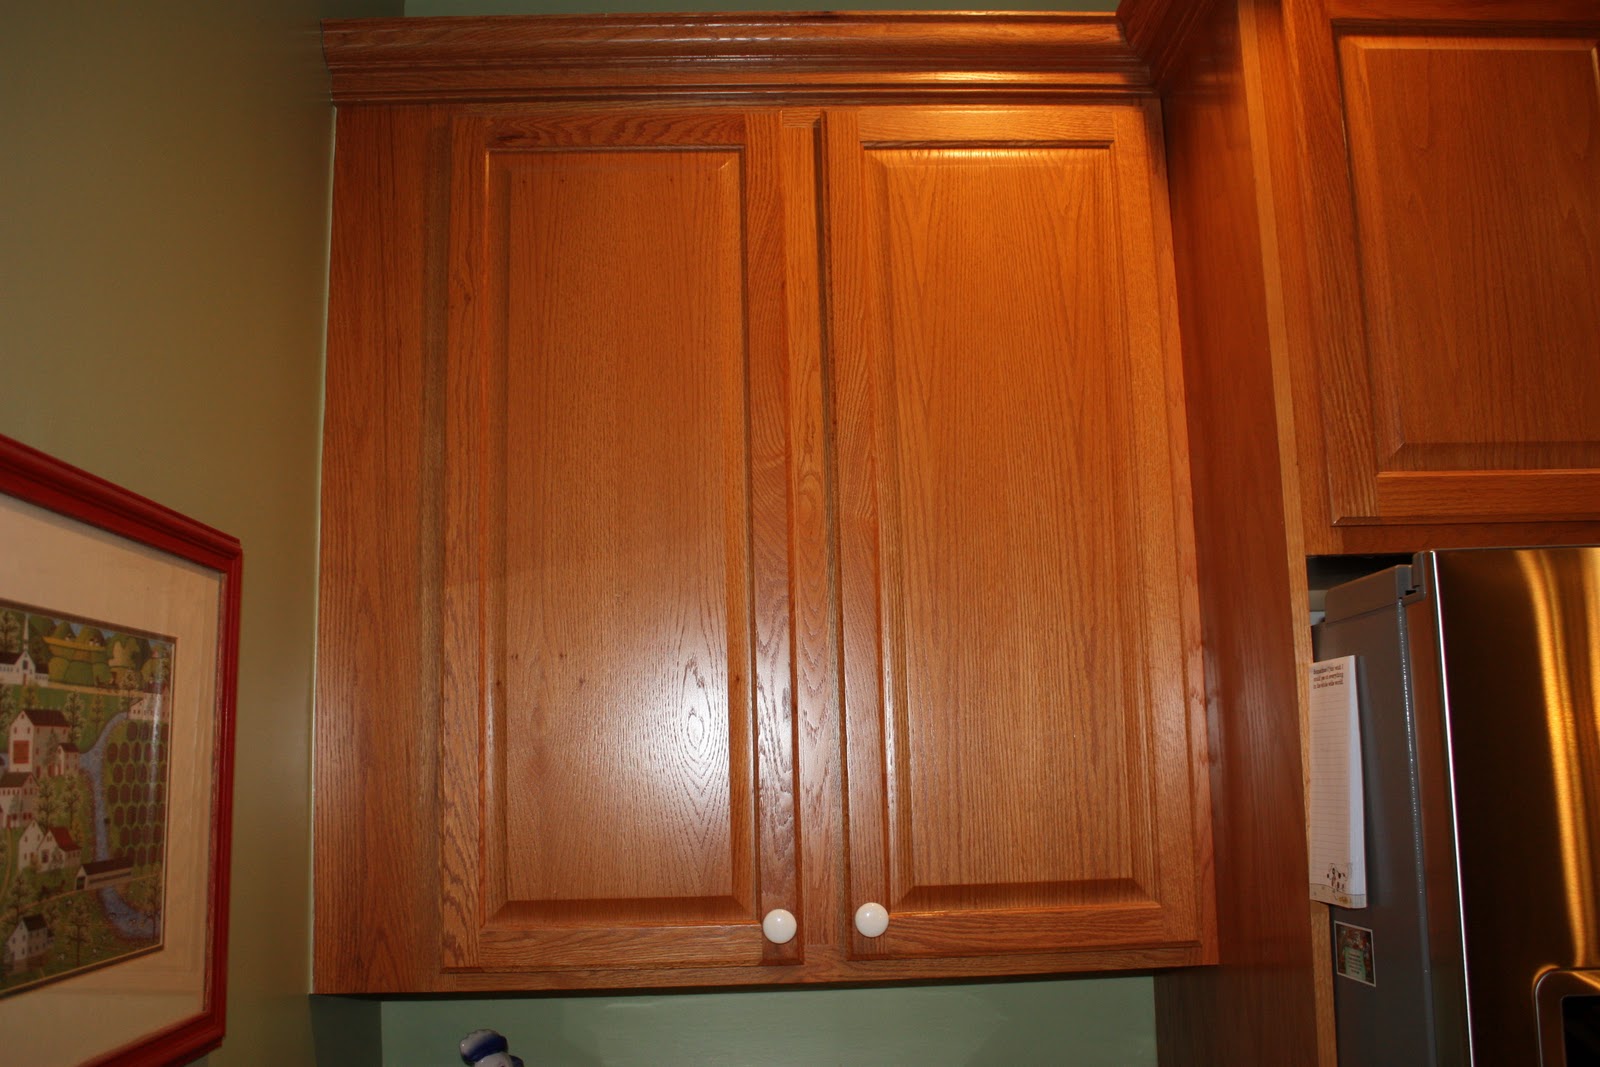
The Never-Ending Kitchen Cabinets
I have been staring at my kitchen cabinets for six years wishing they would change. Mediocre, uninteresting, bland...well, you get the picture. So I decided to make changes, a few cabinets at a time, starting with those above the kitchen desk area. I say desk, but what I mean is 'the dump.'
I was hoping to make a display for the dishes and platters I had to keep hidden behind those bland, oh-so-boring cabinet doors. I love how it came out, and now I'm ready to tackle the other cabinets (leaving the doors on this time).

I still stare at my kitchen cabinets, but now I do it with LOVE in my eyes.
I was hoping to make a display for the dishes and platters I had to keep hidden behind those bland, oh-so-boring cabinet doors. I love how it came out, and now I'm ready to tackle the other cabinets (leaving the doors on this time).


I painted the inside with a turquoise paint I bought on the clearance shelf at Home Depot for $2.50.
And when two coats had dried, I put the shelves back in then glued painted moulding to the shelf edges to give the display a custom look.
The most fun was deciding what items I would put on the shelves of my brand new custom display cabinet!!!
I included favorite pieces old and new. The narrow cubbies on the bottom were tough to paint so after a messy first coat attempt, I rolled up vintage music sheets and placed those inside the wider cubbies. The music unrolled itself to fit the space perfectly.
The project took two days and cost less than ten dollars! Yeah!!
Saturday, November 5, 2011
Hotel Side Table Transformation

While trying to find inexpensive furniture for our teenage daughter my husband and I stumbled upon a hotel furniture liquidation sale. For ten bucks we bought a white laminate and faux-wicker table that fit perfectly in her room. It fit, but it was not very cheery, or even interesting. With paint and some scrap tumbled travertine tile I was able to give the table a little life and after adding stone knobs to the drawers it looked pretty swanky. The grand total for this project was $22.00. Granted this is a stinky picture, but you get the drift. Nothing more to see her folks....
Thursday, October 13, 2011
My Father's Daughter

I was unpacking some bits and pieces I brought back from cleaning out stuff in my mom's house. She died in May, and if anyone has had to go through their parent's belongings, you know how emotionally hard it can be. I found clock parts and gears and all sorts of old gorgeous junk from the turn of the century in the garage. It is a wonderful inheritance and the discovery made me realize how much I am my father's daughter! For years and years my dad had all kinds of old parts and sundry pieces packed away. How perfect a gift for a shabby-vintage-loving daughter? Of course, the china and the silver tea service are also right up my emotional alley. The older we get, the more we become just like our parents? The photo above was taken of my refurbished tea cart with the randomly placed gifts. I was sorting and unwrapping objects and placing them here and there before deciding what to do with each gem. I love the photo, it's randomly lovely and particularly poignant for me. Thank you, mom and dad.
Wednesday, October 5, 2011
Painting a Vintage Tea Cart


Here is another Good Will furniture purchase ($20.00). This cart was in good shape, but lacked personality. All furniture from my childhood seemed to be finished exactly the same way, and with it's early American style and dark stain, this tea cart was quite the thing in the 50s and 60s. Ethan Allen sold a tea cart very much like this one (I've seen several listed on Ebay) and they were not cheap. The before photo is of a different cart, but very similar to mine. I often jump into the task without taking my before photograph. I'm trying not to do that any more...we'll see how I do.
When I spied this funky little cart, I knew it could be adorable. And I've always wanted a tea cart like the ones in the historical romance novels....you know? The butler arrives with the tea cart and then the hushed, plot-twisting conversation begins.......one lump or two?
I admit, the photo stinks, so you can't see the depth of the color or the satin finish. I promise myself I'll retake the photo and update...anyway...the cart has drop sides, a lower shelf and a drawer for all the accoutrements of an afternoon tea. (Butler is extra.)
The base color is pale blue with crackle added here and there and topcoated with light green. I used my Silhouette SD to cut out the bird motif in black card stock then added silver, gold and black paint to give a worn appearance. I hope it appears to be something painted several times over the years with old and new paint visible.
Total cost of my project: $35.00 for the cart and paint.
Friday, September 23, 2011
Boring Hallway Table Gets Personality With Paint
Thirty years ago, before I knew what furniture style I really liked, I bought traditional dark wood and felt safe with my choices. When the decorating bug bit me years later I knew I didn't want the traditional furniture I had, and I also knew that I couldn't afford to start over! This is the first furniture painting project I tackled now and 15 years later, I still like it. It makes me smile....Take a look, and let me know what you think. :)


 This was a big project for a first try. I don't think I'd want to tackle it now! But with the enthusiasm of the young and naive, I marblized the tops and made stripes using tape to separate the colors. The feet are purple, the bands are gold, the legs are green with burgundy and the table edges are a honey brown. Once all the paint had dried I applied gold metallic paint here and there with a stiff dry brush. After a week, I painted the whole with a protectant made for faux painting. It gave the piece a lovely matte finish and blended the different sections so they didn't appear as separately painted sections. Maybe that's why it's called finish? It may sound crazy, but the overall effect is pleasantly subtle. I was under the influence of Mackenzie-Childs at the time and I still love their designs. Check it out. http://www.mackenzie-childs.com/


Subscribe to:
Comments (Atom)